Full Stack 교육 회고록
2022.11.30 - 안드로이드 전화번호부, 포켓몬 도감 만들기
순두부 호랑이
2022. 12. 1. 00:27
728x90
SMALL
1. Adapter View 사용해서 전화번호부 만들기
2. SubActivity로 부터 받아온 값으로 Main에 ListView에 추가

[MainActivity]
package com.example.ex20221130

import androidx.appcompat.app.AppCompatActivity
import android.os.Bundle
import android.widget.ListView

class MainActivity : AppCompatActivity() {

    var phoneList = ArrayList<PhoneVO>()

    override fun onCreate(savedInstanceState: Bundle?) {
        super.onCreate(savedInstanceState)
        setContentView(R.layout.activity_main)

        val lv = findViewById<ListView>(R.id.lv)

        // 1. 화면에서 ListView의 위치 정해주기(xml 파일) ✅

        // 2. ListView 한 칸에 들어갈 디자인 정해주기(xml 파일) ✅

        // 3. ListView에 들어갈 데이터 만들기 -> 하나의 자료형( PhoneVO)
        // 이미지뷰에 들어갈 Image의 ID값(Int)
        // 이름, 전화번호 (String)
        val p1 = PhoneVO(R.drawable.img1,"강예진","010-1234-5678")
        val p2 = PhoneVO(R.drawable.img2,"선영표","010-1234-5678")
        val p3 = PhoneVO(R.drawable.img3,"조자연","010-1234-5678")
        val p4 = PhoneVO(R.drawable.img4,"김동원","010-1234-5678")
        val p5 = PhoneVO(R.drawable.img5,"채수민","010-1234-5678")

        phoneList.add(p1)
        // phoneList.add(PhoneVO(R.drawable.img2,"선영표","010-1234-5678))
        phoneList.add(p2)
        phoneList.add(p3)
        phoneList.add(p4)
        phoneList.add(p5)

        // 4. Adapter 만들기
        // 데이터의 자료형이 내가만든 자료형(vo) 이기 때문에
        // 안드로이드에서 기본적으로 제공하는 ArrayAdapter는 사용이 불가능
        // Adatper: 데이터랑 템플릿을 합쳐서 ListView에 적재시켜주는 역할
        val adapter = PhoneAdapter(applicationContext, R.layout.phone_list, phoneList)
        // 5. ListView에 Adapter 적용
        lv.adapter = adapter
        // 6. 이벤트 달아주기

    }
}
[activity_main.xml]
<?xml version="1.0" encoding="utf-8"?>
<androidx.constraintlayout.widget.ConstraintLayout xmlns:android="http://schemas.android.com/apk/res/android"
    xmlns:app="http://schemas.android.com/apk/res-auto"
    xmlns:tools="http://schemas.android.com/tools"
    android:layout_width="match_parent"
    android:layout_height="match_parent"
    tools:context=".MainActivity">

    <ListView
        android:id="@+id/lv"
        android:layout_width="0dp"
        android:layout_height="0dp"
        app:layout_constraintBottom_toBottomOf="parent"
        app:layout_constraintEnd_toEndOf="parent"
        app:layout_constraintStart_toStartOf="parent"
        app:layout_constraintTop_toTopOf="parent" />
</androidx.constraintlayout.widget.ConstraintLayout>
[PhoneAdapter]
package com.example.ex20221130

import android.content.ClipData
import android.content.Context
import android.content.Intent
import android.net.Uri
import android.view.LayoutInflater
import android.view.View
import android.view.ViewGroup
import android.widget.BaseAdapter
import android.widget.Button
import android.widget.FrameLayout
import android.widget.ImageView
import android.widget.TextView

class PhoneAdapter(val context: Context, val layout: Int, val data: ArrayList<PhoneVO>) : BaseAdapter() {

    // 프로퍼티 : 필드
    // 멤버 : 메서드

    // Activity의 힘(Context)을 빌려서 Inflate를 할 수 있는 Inflater를 가져오자
    var inflater = context.getSystemService(Context.LAYOUT_INFLATER_SERVICE) as LayoutInflater?
    // getSystemService는 하드웨어(핸드폰)에 담겨있는 센서들이나, Inflater를
    // 추출 할 수 있는 메서드
    // 많은 센서들이 담겨있고 각각의 리턴값을 설정해주기 힘듬
    // Any타입으로 리턴하고 있는데 내가 Inflater를 빼면 Inflater로 형변환


    override fun getCount(): Int {
        // ListView의 항목의 개수
        return data.size
    }

    override fun getItem(p0: Int): Any {
        // p0 : position
        //position에 위치한 data를 반환
        return data[p0]
    }

    override fun getItemId(p0: Int): Long {
        //position 번째 id값을 반환
        return p0.toLong()
    }

    //✨✨✨✨✨
    override fun getView(p0: Int, p1: View?, p2: ViewGroup?): View {
        // 데이터+템플릿을 합친 뷰를 return 해주자

        // findViewById, setContentView : Activity만 할 수 있는 일
        // 여기는 Class 위에 뷰를 찾아오는 메서드 사용이 불가능
        // Activity의 힘을 빌릴 수 있다 --> inflate
        // Inflate:코드로 있는 xml 파일을 눈에 보이는 뷰로 바꿔주는 작업
        // inflater는 inflate를 할 수 있는 친구
        var view = p1
        //p1: value라서 아래에서 다른 값을 넣을 수 없음

        // p0: 항목의 번호(position)
        // p1: 이전에 만들어진 View(xml을 눈에보이는 형태로 바꾼거)
        // p2: 모든 뷰(항목)을 담고있는 ListView
        if (view == null) {
            view = inflater?.inflate(layout, p2, false)
        }

        // 코드로 존재하는 layout을 눈에 보이는 View 객체로 바꿔주자

        // layout, 누가 이 템플릿을 포함할껀지, false
        val tvName = view?.findViewById<TextView>(R.id.tvName)
        val tvTel = view?.findViewById<TextView>(R.id.tvTel)
        val img = view?.findViewById<ImageView>(R.id.img)
        val btnCall = view?.findViewById<Button>(R.id.btnCall)

        // ArrayList --> data --> (id, name, tel)
        tvName?.text = data[p0].name
        tvTel?.text = data[p0].tel
        img?.setImageResource(data[p0].imgId)
        btnCall?.setOnClickListener {
            // 전화번호를 가져와서 ACTION_DIAL이 실행되게 만들자
            // 액션, 데이터(URi tel:)
            var tel = Uri.parse("tel:${tvTel?.text.toString()}")
            val intent = Intent(Intent.ACTION_DIAL, tel)
            // 새로운 Task(Stack 통)을 만들어서 실행
            intent.addFlags(Intent.FLAG_ACTIVITY_NEW_TASK)
            // Activity의 힘을 빌려서 start할 예정
            // Activity의 힘 : context
            context.startActivity(intent)
        }

        //inflat 가 된 view를 리턴 (데이터 + 템플릿)
        return view!!
    }
}
[phoneVO]
package com.example.ex20221130

class PhoneVO(val imgId: Int, val name: String, val tel:String) {
    // img의 Id값
    // name
    // tel
}
[phone_list]
<?xml version="1.0" encoding="utf-8"?>
<androidx.constraintlayout.widget.ConstraintLayout xmlns:android="http://schemas.android.com/apk/res/android"
    xmlns:app="http://schemas.android.com/apk/res-auto"
    xmlns:tools="http://schemas.android.com/tools"
    android:layout_width="match_parent"
    android:layout_height="wrap_content"
    android:padding="16dp">

    <ImageView
        android:id="@+id/img"
        android:layout_width="100dp"
        android:layout_height="100dp"
        app:layout_constraintStart_toStartOf="parent"
        app:layout_constraintTop_toTopOf="parent"
        app:srcCompat="@drawable/img3" />

    <TextView
        android:id="@+id/tvName"
        android:layout_width="wrap_content"
        android:layout_height="wrap_content"
        android:layout_marginStart="40dp"
        android:layout_marginTop="24dp"
        android:text="이름"
        android:textSize="16sp"
        app:layout_constraintStart_toEndOf="@+id/img"
        app:layout_constraintTop_toTopOf="@+id/img" />

    <TextView
        android:id="@+id/tvTel"
        android:layout_width="wrap_content"
        android:layout_height="wrap_content"
        android:layout_marginTop="24dp"
        android:text="전화번호"
        android:textSize="16sp"
        app:layout_constraintStart_toStartOf="@+id/tvName"
        app:layout_constraintTop_toBottomOf="@+id/tvName" />

    <Button
        android:id="@+id/btnCall"
        android:layout_width="wrap_content"
        android:layout_height="wrap_content"
        android:text="전화걸기"
        app:layout_constraintBottom_toBottomOf="@+id/img"
        app:layout_constraintEnd_toEndOf="parent"
        app:layout_constraintTop_toTopOf="@+id/img" />
</androidx.constraintlayout.widget.ConstraintLayout>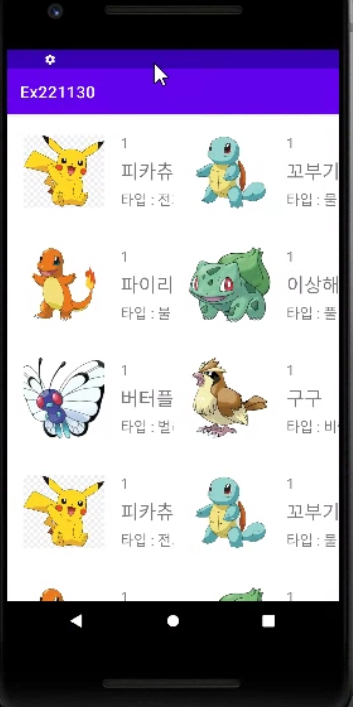
[ExamAdapter]
package com.example.ex221130

import android.content.Context
import android.view.LayoutInflater
import android.view.View
import android.view.ViewGroup
import android.widget.ImageView
import android.widget.TextView
import androidx.recyclerview.widget.RecyclerView

class ExamAdapter(val context: Context, val pokeList: ArrayList<PokeVO>) :
    RecyclerView.Adapter<ExamAdapter.ViewHolder>() {

    class ViewHolder(itemView: View) : RecyclerView.ViewHolder(itemView) {
        val imgPoke : ImageView
        val tvPokeLevel : TextView
        val tvPokeName : TextView
        val tvPokeType : TextView

        init {
            imgPoke = itemView.findViewById(R.id.imgPoke)
            tvPokeLevel = itemView.findViewById(R.id.tvPokeLevel)
            tvPokeName = itemView.findViewById(R.id.tvPokeName)
            tvPokeType= itemView.findViewById(R.id.tvPokeType)
        }
    }

    override fun onCreateViewHolder(parent: ViewGroup, viewType: Int): ViewHolder {

        val layoutInflater = LayoutInflater.from(context)
        val view = layoutInflater.inflate(R.layout.poke_list,null)
        return ViewHolder(view)
    }

    override fun onBindViewHolder(holder: ViewHolder, position: Int) {
        holder.imgPoke.setImageResource(pokeList.get(position).img)
        holder.tvPokeLevel.setText(pokeList.get(position).level)
        holder.tvPokeLevel.setText(pokeList.get(position).name)
        holder.tvPokeLevel.setText(pokeList.get(position).type)
    }

    override fun getItemCount(): Int {
        return pokeList.size
    }


}
[MainActivity]
package com.example.ex221130

import androidx.appcompat.app.AppCompatActivity
import android.os.Bundle
import android.widget.ListView

class MainActivity : AppCompatActivity() {
    override fun onCreate(savedInstanceState: Bundle?) {
        super.onCreate(savedInstanceState)
        // activity_main -> Kotlin에서 접근 가능
        setContentView(R.layout.activity_main)

        // Adapter View
        // - ListView
        //  안쪽에 사용하고 있는 Adapter에서 findViewById()가 굉장히 많이 호출된다
        // 안드로이드에서 메모리 리소스를 많이 잡아먹는 함수 중 하나
        // 개발 -> 유지보수!!
        // 한글과 영어대문자가 이름, 확장자에 들어가면 안됨!

        // - RecylerView

        // AdapterView 만드는 6단계
        // 1) Container 결정
        val lvPoke = findViewById<ListView>(R.id.lvPoke)

        // 2) Template 결정
        // poke_list.xml

        // 3) Item 결정
        // PokeVO class 생성!!
        val pokeList = ArrayList<PokeVO>()
        pokeList.add(PokeVO(R.drawable.p1, "피카츄", "전기"))
        pokeList.add(PokeVO(R.drawable.p2, "꼬부기", "물"))
        pokeList.add(PokeVO(R.drawable.p3, "파이리", "불"))
        pokeList.add(PokeVO(R.drawable.p4, "이상해씨", "풀"))
        pokeList.add(PokeVO(R.drawable.p5, "버터플", "벌레"))
        pokeList.add(PokeVO(R.drawable.p6, "구구", "비행"))


        // 4) Adapter 결정
        // PokeAdapter 생성!!
        // ArrayAdapter(페이지 정보, 템플릿, TV id, data)
        val adapter = PokeAdapter(this@MainActivity, pokeList)

        // 5) Container에 Adapter 부착
        lvPoke.adapter = adapter

        // 6) Event 처리
    }
}
[activity_main.xml]
<?xml version="1.0" encoding="utf-8"?>
<androidx.constraintlayout.widget.ConstraintLayout xmlns:android="http://schemas.android.com/apk/res/android"
    xmlns:app="http://schemas.android.com/apk/res-auto"
    xmlns:tools="http://schemas.android.com/tools"
    android:layout_width="match_parent"
    android:layout_height="match_parent"
    tools:context=".MainActivity">

    <ListView
        android:id="@+id/lvPoke"
        android:layout_width="0dp"
        android:layout_height="0dp"
        app:layout_constraintBottom_toBottomOf="parent"
        app:layout_constraintEnd_toEndOf="parent"
        app:layout_constraintStart_toStartOf="parent"
        app:layout_constraintTop_toTopOf="parent" />
</androidx.constraintlayout.widget.ConstraintLayout>
[MainActivity2]
package com.example.ex221130

import androidx.appcompat.app.AppCompatActivity
import android.os.Bundle
import androidx.recyclerview.widget.GridLayoutManager
import androidx.recyclerview.widget.LinearLayoutManager
import androidx.recyclerview.widget.RecyclerView

class MainActivity2 : AppCompatActivity() {
    override fun onCreate(savedInstanceState: Bundle?) {
        super.onCreate(savedInstanceState)
        setContentView(R.layout.activity_main2)

        // - RecyclerView
        // - ListView의 개선판 : ViewHolder를 강제!!

        // - LayoutManger : 유연하다
        // -> Linear
        // -> Grid
        // -> StraggleGrid

        // AdapterView 6단계
        // 1) Container 결정
        val rvPoke = findViewById<RecyclerView>(R.id.rvPoke)

        // 2) Template 결정
        // poke_list.xml

        // 3) Item 결정
        val pokeList = ArrayList<PokeVO>()
        pokeList.add(PokeVO(R.drawable.p1, "피카츄", "전기"))
        pokeList.add(PokeVO(R.drawable.p2, "꼬부기", "물"))
        pokeList.add(PokeVO(R.drawable.p3, "파이리", "불"))
        pokeList.add(PokeVO(R.drawable.p4, "이상해씨", "풀"))
        pokeList.add(PokeVO(R.drawable.p5, "버터플", "벌레"))
        pokeList.add(PokeVO(R.drawable.p6, "구구", "비행"))

        // 4) Adapter 결정
        val adapter = PokeAdapter2(this, pokeList)

        // 5) Container 에 Adapter 부착
        rvPoke.adapter = adapter
        // 5-2) 내가 구현하고자 하는 모양에 맞는 LayoutManager를 결정!
        // 수직으로 쌓기!!
//        rvPoke.layoutManager = LinearLayoutManager(this)
        rvPoke.layoutManager = GridLayoutManager(this,2)
    }
}
[activity_main2.xml]
<?xml version="1.0" encoding="utf-8"?>
<androidx.constraintlayout.widget.ConstraintLayout xmlns:android="http://schemas.android.com/apk/res/android"
    xmlns:app="http://schemas.android.com/apk/res-auto"
    xmlns:tools="http://schemas.android.com/tools"
    android:layout_width="match_parent"
    android:layout_height="match_parent"
    tools:context=".MainActivity2">

    <androidx.recyclerview.widget.RecyclerView
        android:id="@+id/rvPoke"
        android:layout_width="0dp"
        android:layout_height="0dp"
        app:layout_constraintBottom_toBottomOf="parent"
        app:layout_constraintEnd_toEndOf="parent"
        app:layout_constraintHorizontal_bias="1.0"
        app:layout_constraintStart_toStartOf="parent"
        app:layout_constraintTop_toTopOf="parent" />
</androidx.constraintlayout.widget.ConstraintLayout>
[PokeAdpter]
package com.example.ex221130

import android.content.Context
import android.util.Log
import android.view.LayoutInflater
import android.view.View
import android.view.ViewGroup
import android.widget.BaseAdapter
import android.widget.ImageView
import android.widget.TextView

// 상속받을때 : 써서 오른쪽에 super(부모)클래스 작성
class PokeAdapter(val context: Context, val pokeList: ArrayList<PokeVO>) : BaseAdapter() {
    override fun getCount(): Int {
        // itemView(항목 뷰)가 몇 번 만들어져야 하는지
        return pokeList.size
    }

    override fun getItem(p0: Int): Any {
//        return pokeList.get(p0)
        return pokeList[p0]
    }

    override fun getItemId(p0: Int): Long {
        return p0.toLong()
    }

    // ✨✨✨✨✨
    // p0 : position
    // p1 : itemView
    override fun getView(p0: Int, p1: View?, p2: ViewGroup?): View {

        // 0. xml -> Kotlin : Inflator
        val layoutInflater = LayoutInflater.from(context)

        // 1. poke_list.xml -> 코드로 접근할 수 있게
        var view = layoutInflater.inflate(R.layout.poke_list, null)
        val viewHolder = ViewHolder()
        var holder = ViewHolder()

        if(p1 == null){
            Log.d("호출", "1")
            // 항목 뷰(itemView)가 안 만들어졌을 때!
            // 각 component들을 초기화시켜주자!
            holder.imgPoke = view.findViewById<ImageView>(R.id.imgPoke)
            holder.tvPokeLevel = view.findViewById<TextView>(R.id.tvPokeLevel)
            holder.tvPokeName = view.findViewById<TextView>(R.id.tvPokeName)
            holder.tvPokeType = view.findViewById<TextView>(R.id.tvPokeType)

            view.tag = holder

        }else{
            Log.d("호출", "2")
            holder = p1.tag as ViewHolder
            view = p1
        }

        holder.imgPoke?.setImageResource(pokeList.get(p0).img)
        holder.tvPokeLevel?.setText("Level : " + pokeList.get(p0).level)
        holder.tvPokeName?.setText(pokeList.get(p0).name)
        holder.tvPokeType?.setText("타입 :  " + pokeList.get(p0).type)

        return view

    }

    // inner Class
    // 1. 부모 클래스의 변수들을 다 사용할 수 있다!!
    // 2. 외부에서 이 inner Class를 사용할 이유가 없을 때!

    // Design Pattern (ex. MVC)

    // ViewHolder Pattern
    // getView의 findViewById로 접근한 정보들을 저장하고 있는 class ViewHolder를 만들어서
    // 메모리의 성능을 향상시키자!!

    class ViewHolder(){
        var imgPoke : ImageView? = null
        var tvPokeLevel : TextView? = null
        var tvPokeName : TextView? = null
        var tvPokeType : TextView? = null
    }

}
[PokeAdpter2]
package com.example.ex221130

import android.content.Context
import android.view.LayoutInflater
import android.view.View
import android.view.ViewGroup
import android.widget.ImageView
import android.widget.TextView
import androidx.recyclerview.widget.RecyclerView

class PokeAdapter2(val context: Context, val pokeList: ArrayList<PokeVO>) :
    RecyclerView.Adapter<PokeAdapter2.ViewHolder>(){

    class ViewHolder(itemView : View) : RecyclerView.ViewHolder(itemView){

        val imgPoke : ImageView
        val tvPokeLevel : TextView
        val tvPokeName : TextView
        val tvPokeType : TextView

        init {
            imgPoke = itemView.findViewById(R.id.imgPoke)
            tvPokeLevel = itemView.findViewById(R.id.tvPokeLevel)
            tvPokeName = itemView.findViewById(R.id.tvPokeName)
            tvPokeType = itemView.findViewById(R.id.tvPokeType)
        }
    }

    //itemView가 없을 때, ViewHolder 생성!
    override fun onCreateViewHolder(parent: ViewGroup, viewType: Int): ViewHolder {

        val layoutInflater = LayoutInflater.from(context)
        val view = layoutInflater.inflate(R.layout.poke_list,null)

        return  ViewHolder(view)
    }

    // 만들어진 ViewHolder가 있다면, 꺼내서 쓰는 곳!!
    override fun onBindViewHolder(holder: ViewHolder, position: Int) {

        holder.imgPoke.setImageResource(pokeList.get(position).img)
        holder.tvPokeLevel.setText(pokeList.get(position).level)
        holder.tvPokeName.setText(pokeList.get(position).name)
        holder.tvPokeType.setText("타입 : "+ pokeList.get(position).type)
    }

    override fun getItemCount(): Int {
        return pokeList.size
    }
}
[PokeVo]
package com.example.ex221130

class PokeVO {
    val img : Int
    val name : String
    val type: String
    var level : String

    constructor(img : Int, name: String, type : String){
        this.img = img
        this.name = name
        this.type = type
    }
    init {
        // 생성 시 가장 먼저 호출되는 부분
        // 초기화시킬 대상들을 넣어준다
        level = "1"
    }
}
[activity_poke_list.xml]
<?xml version="1.0" encoding="utf-8"?>
<androidx.constraintlayout.widget.ConstraintLayout xmlns:android="http://schemas.android.com/apk/res/android"
    xmlns:app="http://schemas.android.com/apk/res-auto"
    xmlns:tools="http://schemas.android.com/tools"
    android:layout_width="match_parent"
    android:layout_height="match_parent"
    tools:context=".poke_list">

</androidx.constraintlayout.widget.ConstraintLayout>
[poke_list.xml]
<?xml version="1.0" encoding="utf-8"?>
<androidx.constraintlayout.widget.ConstraintLayout xmlns:android="http://schemas.android.com/apk/res/android"
    xmlns:app="http://schemas.android.com/apk/res-auto"
    xmlns:tools="http://schemas.android.com/tools"
    android:layout_width="match_parent"
    android:layout_height="wrap_content">

    <ImageView
        android:id="@+id/imgPoke"
        android:layout_width="100dp"
        android:layout_height="100dp"
        android:layout_marginStart="20dp"
        android:layout_marginTop="20dp"
        android:layout_marginBottom="20dp"
        app:layout_constraintBottom_toBottomOf="parent"
        app:layout_constraintStart_toStartOf="parent"
        app:layout_constraintTop_toTopOf="parent"
        app:srcCompat="@drawable/p1" />

    <TextView
        android:id="@+id/tvPokeLevel"
        android:layout_width="wrap_content"
        android:layout_height="30dp"
        android:layout_marginStart="20dp"
        android:gravity="center_vertical"
        android:text="Lv : 1"
        android:textSize="18sp"
        app:layout_constraintStart_toEndOf="@+id/imgPoke"
        app:layout_constraintTop_toTopOf="@+id/imgPoke" />

    <TextView
        android:id="@+id/tvPokeName"
        android:layout_width="wrap_content"
        android:layout_height="40dp"
        android:gravity="center_vertical"
        android:text="피카츄"
        android:textSize="24sp"
        app:layout_constraintStart_toStartOf="@+id/tvPokeLevel"
        app:layout_constraintTop_toBottomOf="@+id/tvPokeLevel" />

    <TextView
        android:id="@+id/tvPokeType"
        android:layout_width="wrap_content"
        android:layout_height="30dp"
        android:gravity="center_vertical"
        android:text="전기"
        android:textSize="18sp"
        app:layout_constraintBottom_toBottomOf="@+id/imgPoke"
        app:layout_constraintStart_toStartOf="@+id/tvPokeName"
        app:layout_constraintTop_toBottomOf="@+id/tvPokeName" />
</androidx.constraintlayout.widget.ConstraintLayout>
728x90
LIST